The Gardening Passion garden and The Quick Turn garden were raised beds gardens. I learned a hearty (read: hard) few lessons I’d love to pass onto you so you can skip the decade of mistakes I’ve already made, so read on!
If you want to build raised beds, let’s start with a few questions to help you sort out all the options.
- How long do you see yourself gardening in that location?
- What would look nice esthetically in your yard and/or neighborhood?
- What is your budget?
- What is the gardening space like?
Case Study Examples
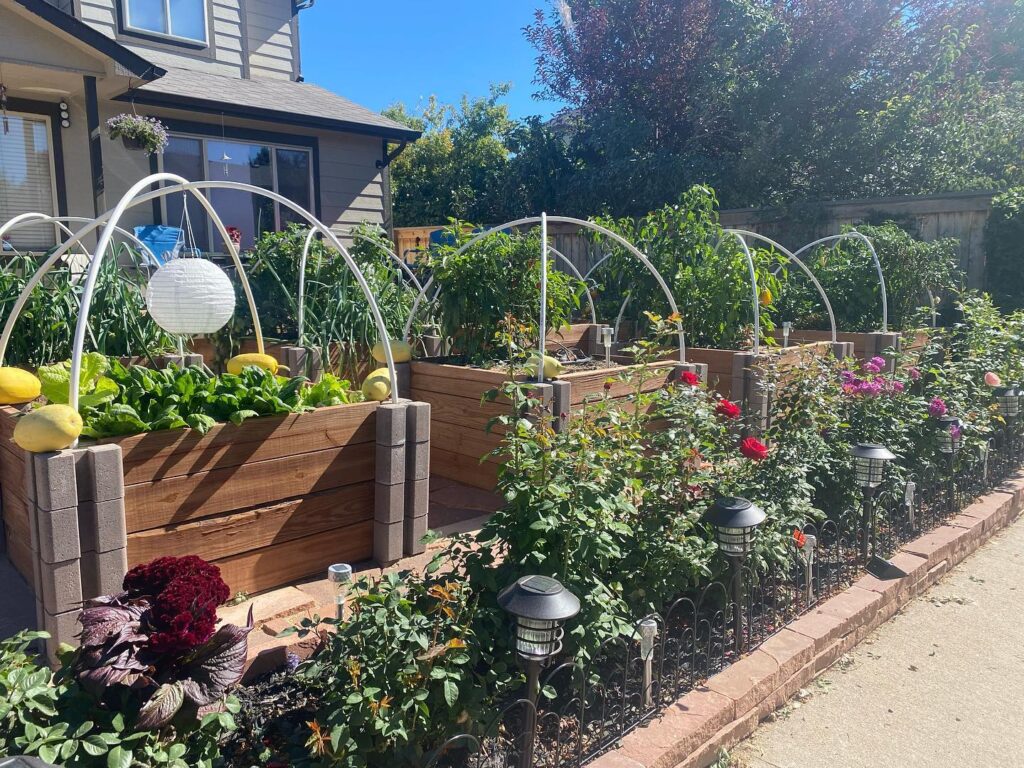
Raised Garden Bed Example #1
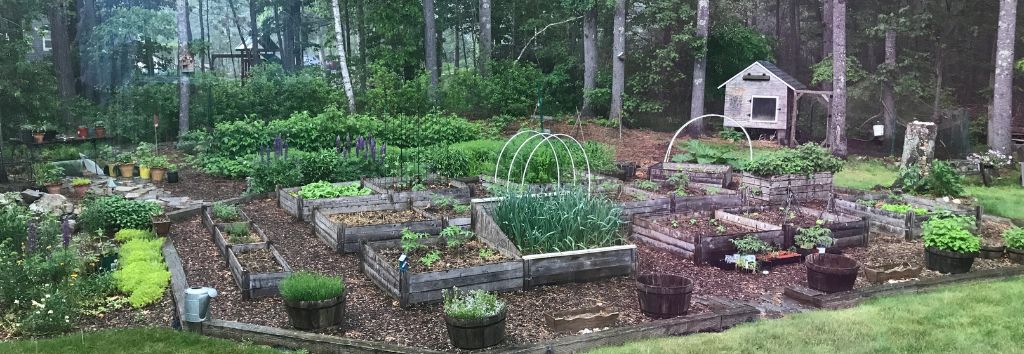
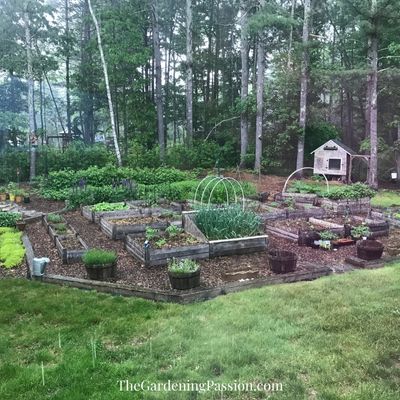
We chose cedar wood kits for The Gardening Passion garden because I knew we would live in that house for a while (the kids were around ten at the time). Also, because we live in New England, the beds will sit in the snow for at least six months of the year. In addition, the garden was pushed up against a wooded area which meant a LOT of insect activity. Because I wanted the garden to blend into the neighborhood and our backyard, wood was a natural choice.
Budget, well, that’s a tough one. I found myself balancing between two conversations in my head that went like, “well, cedar will last a long time, and I don’t want to rebuild this.” And also, “Plus, I don’t want to spend the time to build anything.” On the other hand, the land was nice and flat, and because we put the garden where the playset had been, it seemed like the space was ready-made and waiting for my garden.
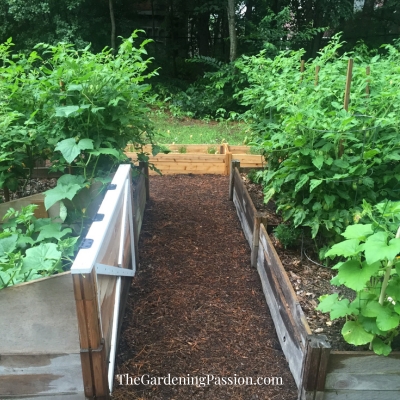
Raised Garden Bed Example #2
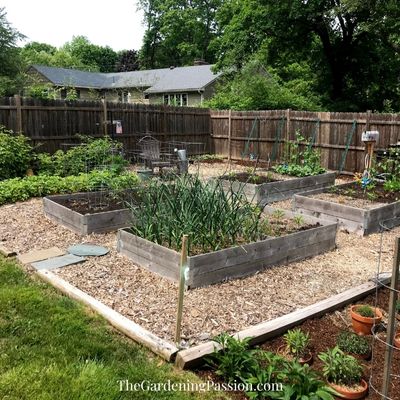
We chose pine wood for The Quick Turn garden because we would only be there two years, and who knows if the new owners would keep the garden. After all, gardens are a lot of work! I figured if they loved the garden, they could upgrade themselves. This house was still in New England, so the wood look worked esthetically. The budget was thin… so pine it was! The land was not level but not on a hill, and I was short on time, money, and patience – so the beds were not great. But it held soil, so… mission accomplished.
Raised Garden Bed Example #3
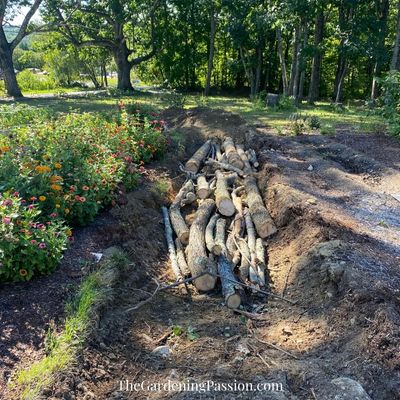
We chose the in-ground hügelkultur method for The Empty Nest garden. This soil was very much clay-heavy, on a downward slant, compacted, and the guy before us stored a boat there, so who knows if it leaked oil or anything else. So beds were out because I knew the garden would be significant, which meant beds would be expensive, and frankly, there was no way I could make the beds level on that slant.
I needed good soil! In addition, the only sun was in this area, but the water was at the furthest end of the house. Hügelkultur to the rescue. Except for one thing, my need to have things neat-and-tidy was not going to be able to handle big messy piles, plus you can see the garden from our neighborhood road. We could build them in the ground with the use of the tractor! Hügelkultur solved three problems for our garden location: terrible soil, slant, and lack of water. In addition, we had plenty of materials because this yard was overgrown (so we had lots of dead wood), had a ton of old oaks (mountains of leaves), and the neighbor down the road had horses (all the free manure we could want!)
In which direction should I build my raised beds?
If you set them up for success, raised beds are a dream to use. There are a lot of variations on how to build and which materials to use, so let’s get started!
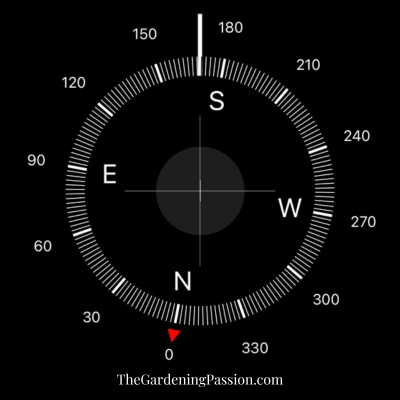
A north-south orientation is best for most crops; the goal is to allow direct sunlight to reach both sides of the bed. To visualize this – imagine you are standing at one end of your bed and looking down the long end. The sun should rotate during the day from your left arm to your right arm, going right over your head.
Another way to visualize a compass on the ground in front of you. Your feet should be standing on the N (north) on a compass, and the S (south) should be at the furthest point of your bed. The sun rises in the east, so if you raise your left arm and point, that’s where the sun comes every morning. Likewise, your right arm should point to the sunsets. You can also find the compass app on your phone too! The idea is that the sun rotates over as much of your beds as possible with the least shade.
Materials
The truth is, you can build raised beds out of many different materials depending on what you have available. However, some will be easier to make, some will last longer, some will be safer, and some will fit your environment better than others. Also, remember that this will be a bit of work—satisfactory work, but why not get the most longevity out of your raised beds as possible? I’ve moved established raised beds into different configurations many times, and it is a LOT of shoveling. So, think about your objectives and your budget. Below is a synopsis of building materials so you can choose the best option for you, your budget, and your environment.
Wood Raised Beds
- Cedar and redwood, in my opinion, are the way to go. Cedar and redwood are naturally water and insect-resistant but can be expensive and hard to find. I got a decade out of my 1” thick premade cedar box kits. I feel like that was reasonable.
- Fir is a suitable material for raised beds but isn’t very long-lasting. Douglas Fir, it is a native and only grows in U.S. Department of Agriculture plant hardiness zones 4 through 6. Although not a true fir, it is the most rot-resistant of the firs. Unfortunately, Douglas fir for raised beds only lasts three to six years.
- Pine is a suitable material for raised beds but isn’t very long-lasting. Untreated lumber, such as pine, is the least durable and is not recommended. It will warp and begin to rot within three to five years. I’ve seen 1” pine warp and decay, and it’s truly disheartening after spending time, money, and labor to build boxes out of pine. So I would not recommend it at all.
- Whole logs are suitable for raised bed construction because the sheer diameter size of whole logs buys you time. However, ensure the logs are entirely dead and dry, or they will sprout new growth! Also, consider location. If they are on your property, then there isn’t a transportation cost. However, the construction can be more complicated, and you will likely need the aid of a tractor to retrieve the logs from their location to your garden, then cut or otherwise alter them so they will stay stacked, and then use the tractor to stack them so you can secure them.
When comparing wood, apples to apples (1” thicknesses) will show one true winner. However, if you can’t swallow the cost of cedar, consider comparing 1” cedar to 4”x4” of fir and pine where you might get the same longevity from. Either way, there will be an expense, so choose wisely.
Metal
I do not have any experience with metal beds, so the only thing I can suggest is to look around at your gardeners who are your neighbors. If they succeed in your zone gardening in metal raised beds, give it a whirl to see if you like it! The upside, of course, is that metal beds will never rot or swell with moisture. The only potential problem I see is whether the metal you choose will rust, leach chemicals into the soil, or get too hot (or too cold) for your environment. I would research quality manufacturers like Birdies Metal Raised Beds to solve those questions. Again, check in with your neighbors; what have their experiences been with metal beds?
Concrete blocks
The concrete blocks and cinder blocks are different, so be sure which you are buying. Concrete blocks are made from Portland cement and aggregates. They are heavier and cost more. (Do not use antique cinder blocks.) The downside, of course, is that they are heavy to transport, but on the upside, they will last forever. Heads-up, to keep your cement block raised beds looking lovely, stay on top of your weeding between the blocks.
Width
Of course, you can make your garden beds any size you’d like, but there is a definite benefit to making them no wider than 3 feet. Wider, and you can’t reach the center to weed without straining your back. An even three feet makes planning garden beds easy if you are using a square-foot gardening strategy. I have had 4’8′ beds in the past, which works well. Larger than this, and the weight of the soil puts too much pressure on the boards. My hugelkultur beds are 3’x30′.
The widths of your walking paths are important also because you will want to get a wheelbarrow in there. However, too much space that requires a ton of weed suppression effort (I use mulch). I like to make my paths the same width as a typical plastic rake – 2′. This creates an easy process for raking fall leaves, and the wheelbarrow fits down them with ease.
Garden Bed Material No-No’s!
- Do not use: cinder blocks. Cinder blocks are made of Portland cement and fly ash, a byproduct of the coal industry. Toxic materials found in the fly ash can leach from the cinder blocks into the soil and then into the food. Cinder blocks can leach toxic substances like calcium oxide, aluminum oxide, and magnesium oxide into the soil. Other heavy metal byproducts such as lead and arsenic may also be present and could also leach. In addition, lime can leach into the soil, raising pH levels over time.
- Do not use Pressure-treated lumber. Wood preservatives containing chromate arsenicals include chromium, copper, and arsenic, which are still in use as of 2021. Recently several new wood preservative active ingredients have been suggested; however, they are still being re-evaluated through EPA’s registration review process.
Time to build the internal structure of your raised beds
Raised beds can be fantastic if constructed correctly. First, let’s make your boxes critter-proof. No need to go through all this work and end up with moles or voles digging their way in to eat your roots. Hardware cloth to the rescue! Simple cut and staple hardware cloth (this is actually a thick metal screen) to the bottom of your boxes.
Now let’s build your soil!
Regardless of what material you build your beds with, raised beds can be amazing if care is taken in building your soil! We build our beds by filling the bottom of a raised garden bed with several organic materials, including wood, chicken manure, straw, grass clippings, wood chips, horse manure, and leaves. Layering materials to work together like this to create healthy soil and retain moisture is also the base concept of hugulkultur.
- Step 1: use hardware cloth on the bottom of your boxes to deter critters.
- Step 2: Place cardboard or a thick amount of newspaper on the bottom of your bed to kill the grass and weed bank below your garden bed.
- Step 3: place dead logs (branches or twigs) in your bed, approximately filling half your bed height. Adding wood takes up bed space, reducing your soil bill, feeding your soil as it decays, and retaining moisture.
- Step 4: cover logs in untreated wood chips to fill gaps between the logs.
- Step 5: rotate organic material in layers like you would in a compost pile alternating green, brown, and good-quality soil. The soil reduces air gaps, provides a basis for healthy soil, and creates an environment to invite worms and beneficial insects life.
- Step 6: reserve the top 3 inches of your bed height for a good quality (organic if possible) raised bed soil. My go-to garden soil is Coast of Maine Garden Bed soil.
- Step 7: plant, water, and enjoy!!
Depth
You will want to have at least 8” of soil depth to accommodate the root systems of plants; 8-12 inches is ideal. Some crops are not suited for raised beds due to space (like corn) or depth (like carrots) without extending your soil depth.
Garden Bed Fill No-No’s!
- Landscape fabric: Landscape fabric can seriously damage and degrade the soil ecosystem below by leaving it more compacted. Soil ecology is essential, and compacted soil won’t be healthy as nutrients, water, and air will not reach the roots in the rhizosphere as effectively. In addition, people buy landscape fabric without realizing that the landscape fabric itself is laced with chemicals, which can leach into the soil.
- Plastic: Avoid lining your garden beds with plastic, as this prevents drainage and could drown your plants’ roots.
- Styrofoam: Styrofoam does not break down. Ever.
- Rocks: Rocks on the bottom of your raised bed creates an artificial water table that will prevent good drainage. With raised garden beds, drainage is essential.
Do you have raised garden beds in your garden already? How did you make them and what do you like about your set-up?
~ Lola
“There are no gardening mistakes, only experiments!”
Enjoy your new garden beds, and please comment – I’d love to hear how your gardens did after their first season!
Materials to build raised garden beds yourself!
This post may contain affiliate links. These affiliate links help support this site. For more information, please see our disclosure policy. Thank you for supporting The Gardening Passion!
Gardens we’ve built
Why I Garden; if you grow it, they will eat it
Community Oasis Garden; exploring the passion
The Gardening Passion Expands; the garden that created a bidding war
Quick Turn Garden; two years and counting
The Empty Nest Garden; totally out of control
Coops we’ve built
How NOT to Build a Chicken Coop
The Bored Engineer’s Coop
This content was originally published at The Gardening Passion and is copyrighted material. If you are reading this on another website, it is being published without consent.